Timeline & clips
The timeline is where the edit actually happens. Clips sit on tracks, tracks stack, and the playhead runs across them.

Getting clips onto it
Drag an asset from the panel onto the timeline, or drop it straight onto the preview. It lands as a clip on a track.
Drop it on an existing track to place it in sequence; drop it above or below to create a new track. Tracks stack visually — higher tracks render in front.
Moving and trimming
Move — drag a clip along its track, or to another track.
Trim — drag either end. Video and audio clips show how much unused material is left at each end, so you know when you've run out of clip rather than discovering it by the edit going wrong.
Split — position the playhead and use the split tool to cut a clip in two at that point. The basis of most editing: cut, remove the middle, close the gap.
Rolling edits — dragging the boundary between two adjacent clips adjusts both at once, keeping the total length the same.
Snapping
Clips snap to each other, to the playhead and to the composition edges, with an indicator showing what you've caught. It's what makes a clean cut easy.
Toggle snapping off from the action row when you need a deliberate fraction-of-a-second offset.
Selecting
Click a clip to select it. Drag across empty timeline to marquee-select several. Selected clips can be cut, copied, duplicated and deleted together.
Reading a clip
Clips show you what's in them:
- Video clips show a filmstrip of thumbnails, so you can see the content without playing it.
- Audio clips show a waveform, so you can see beats and speech gaps and cut to them.
- Video with sound shows both.
Tracks
Each track can be hidden or muted — useful for comparing two versions of a shot, or for silencing a music bed while you check a voiceover.
The timeline panel can be resized, and a zoom slider controls how much time is on screen. Zoom out to see the whole piece, in to trim precisely.
While playing, the timeline follows the playhead so you don't lose it.
Properties
Select anything and the properties panel on the right shows what you can change. What's offered depends on what you selected.
Anything visual — position, size, keep-aspect-ratio, rotation (including a rotate-90 button), opacity, corner radius, alignment, and crop.
Video and audio — volume, playback rate, and fades. Audio fades in and out at the clip's ends; visual fades do the same for pictures.
Text — the full typographic set: the text itself, font family and style, size, colour, alignment, line height, letter spacing, direction, a maximum number of lines, an outline with its own width and colour, and a background block with padding and corner radius. Enough to set a proper title or a readable subtitle.
Solids — colour.
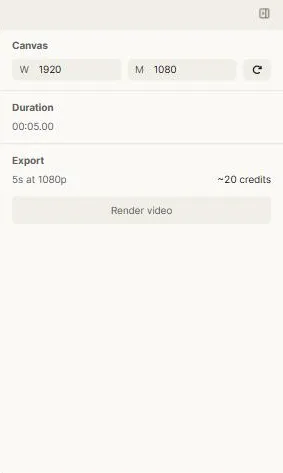
The composition itself — click empty space to get the overall settings, including dimensions and a button to swap width and height when you need the vertical version.
Cropping in the editor
Visual clips can be cropped in place, including backgrounds. Double-click to enter cropping.
Keyboard
The usual editing keys work: undo, redo, select all, delete, backspace to delete, cut, copy, duplicate, and paste — including pasting text and assets straight in.
Next: Rendering & delivery.