Creating images
Describe a picture and Clip makes it, on the canvas, ready to edit.
The generator
Pick Image Generator from the tool rail. A node lands on the canvas and its form opens.
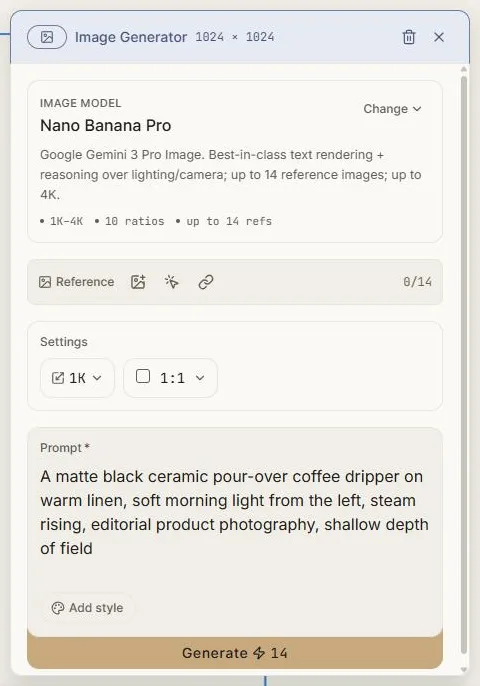
Prompt
The only required field. Write what you want to see. Concrete beats clever: subject, setting, light, and the kind of photograph or illustration it should be.
A matte black ceramic pour-over coffee dripper on warm linen, soft morning light from the left, steam rising, editorial product photography, shallow depth of field
Reference images
Add up to fourteen of your own images to steer the look — a colour palette, a product you need to appear, a style you're matching. Upload them, pick one already on your canvas, or paste a URL.
References guide; they don't guarantee. For an exact object, put it in as a reference and describe it.
Settings
Size runs from 1K to 4K depending on the engine. Larger costs more and takes longer; 1K is right for most drafts and social work.
Aspect ratio offers ten shapes — square, portrait, landscape, story, banner and more.
Style
Add style attaches a named visual style so the result matches a defined look. The node remembers it, so every generation from that node stays consistent. See Style presets.
Model
The engine that makes the picture. Each has different strengths and a different price. Leave it on the default until you have a reason — the default is a strong general-purpose engine. See Choosing a model.
Generating
The button carries the exact cost — Generate ⚡14 — and that figure updates as you change size, ratio and options. What's on the button is what you're charged.
The form is replaced by the running state, with the prompt and a way out:
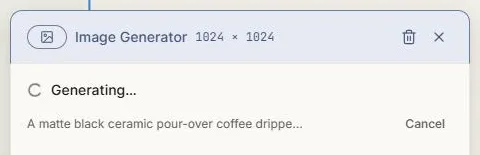
While it runs you get a progress bar, a label for the current stage, and an elapsed timer. You can:
- Carry on working elsewhere on the canvas.
- Close the panel, or the whole project.
- Reload the page — Clip picks the generation back up.
- Cancel it.
If your connection drops, Clip reconnects and recovers. A generation that's already running is not lost by a flaky network.
If you're at your limit
Every plan allows a number of generations at once. Go past it and the extra ones are queued rather than refused — they show their place in line and start automatically as slots free. A queued generation can be cancelled for a full refund; once it's running, it's running.
The result
The node becomes a real image, named from your prompt, placed on top of everything else.
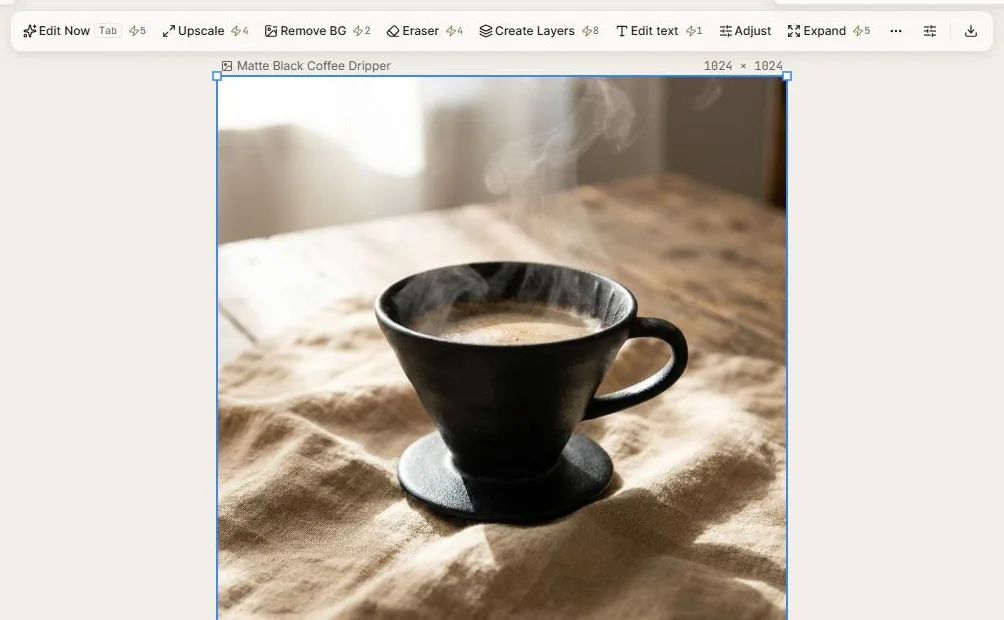
Select it and the AI toolbar appears. From here you can change what's in it, cut out the background, extend it, upscale it, or split it into layers — see Editing images.
To recreate or tweak a result later, right-click it and choose Details for the exact prompt and settings that produced it.
Making several at once
Drop several generator nodes and run them together — they generate in parallel, up to your plan's limit. It's the fastest way to explore directions rather than iterating one at a time.
For many variations at once, describing the job to the design chat is usually quicker: it dispatches the batch and arranges the results for you.
Next: Creating video.